
 Pinnen
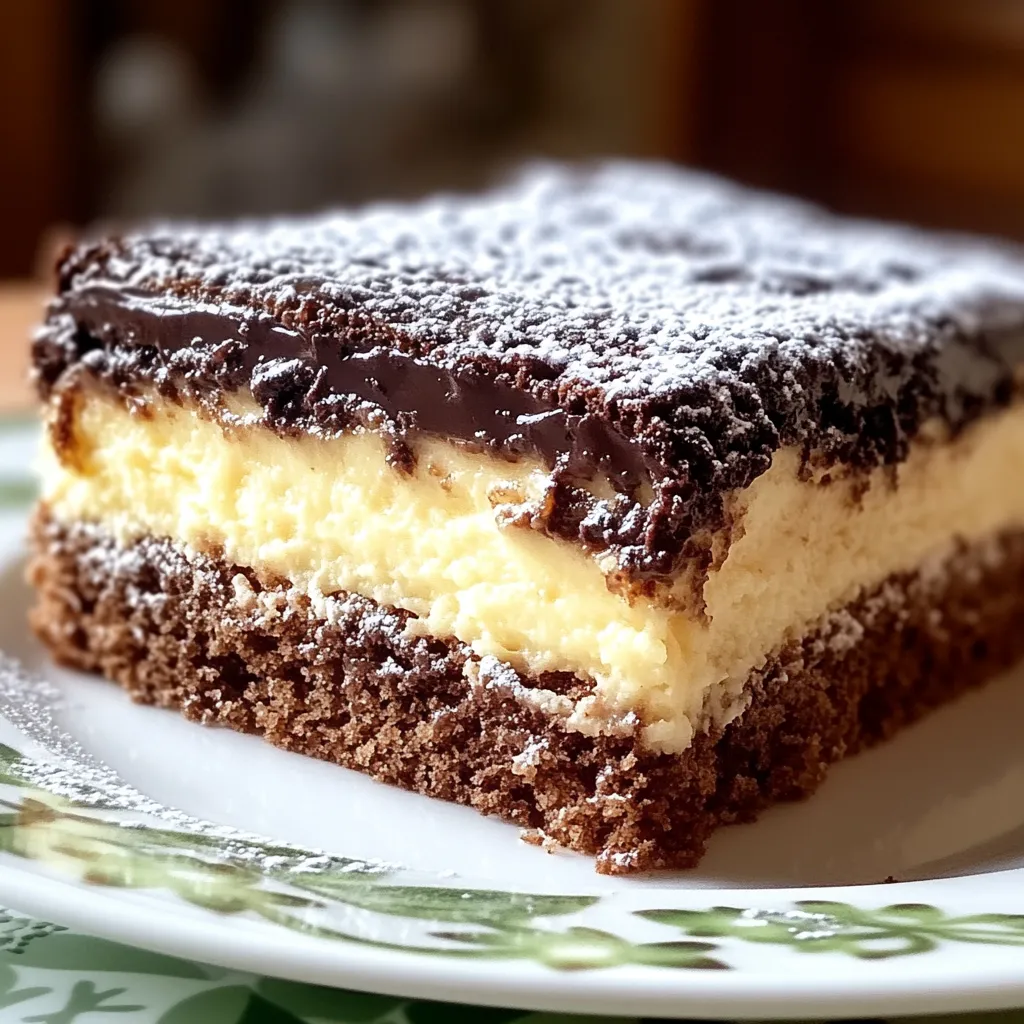
This decadent chocolate cake lives up to its heavenly name with three distinct layers that create a symphony of textures and flavors. The moist chocolate base provides a perfect foundation for the light, creamy filling studded with chocolate shavings, while the glossy ganache topping adds a final touch of indulgence. Each bite delivers the perfect balance of rich chocolate and refreshing creaminess that truly feels like heaven in your mouth.
I first encountered this cake at a friend's birthday celebration and was immediately captivated by its beautiful presentation. After my first bite, I understood why it was called "Heaven in Mouth" cake. The contrast between the dense chocolate cake and the cloud-like cream filling was truly divine. When I finally obtained the recipe and made it myself, my family couldn't believe it wasn't from a professional bakery.
Superior Ingredients
- All-purpose flour: forms the structure of our tender cake base
- Cocoa powder: provides deep chocolate flavor throughout the foundation
- Fresh eggs: create richness and proper structure
- Granulated sugar: balances the cocoa's bitterness with perfect sweetness
- Neutral oil: ensures the cake remains moist for days
- Baking powder: provides the perfect rise for our light base
- Gelatin: transforms our filling from soft to perfectly sliceable
- Water: activates the gelatin properly
- Heavy cream: whips to perfect peaks for our ethereal filling
- Vanilla sugar: adds aromatic sweetness to the cream layer
- Dark chocolate: brings intense flavor and delightful texture to the filling
- Coconut chocolate: adds unique flavor complexity and sweetness
- Cream yogurt: creates tanginess that balances the rich chocolate elements
- Coconut oil: ensures our glaze sets with the perfect snap
- More dark chocolate: creates our glossy, professional-looking topping
Creation Process
- Perfect Cake Foundation:
- Begin by preheating your oven to 375°F (190°C) and preparing a 10-inch (26 cm) springform pan by lining the bottom with parchment paper and lightly greasing the sides. In a large mixing bowl, combine three eggs and forty grams of sugar, then beat with an electric mixer on medium-high speed for approximately five minutes until the mixture becomes very pale, thick, and tripled in volume. This extended beating incorporates crucial air bubbles that create the cake's light texture. Slowly drizzle in twenty milliliters of oil while continuing to beat on low speed until fully incorporated. In a separate bowl, whisk together seventy grams of flour, two tablespoons of cocoa powder, and half a packet of baking powder until evenly combined. Gently fold this dry mixture into the egg mixture using a rubber spatula with a cutting motion rather than stirring, maintaining as much air in the batter as possible. Pour the batter into your prepared pan, smoothing the top with your spatula.
- Gentle Baking:
- Place the springform pan in the center of your preheated oven and bake for precisely twenty minutes. The cake is ready when it springs back lightly when touched in the center and has just begun to pull away from the sides of the pan. Avoid opening the oven during the first fifteen minutes of baking as temperature fluctuations can cause the cake to sink. Once baked, remove from the oven and allow to cool in the pan for five minutes before running a thin knife around the edges and releasing the springform. Transfer the cake to a cooling rack and allow it to cool completely before proceeding with the filling. This cooling time is crucial as a warm cake would melt the creamy filling we will prepare next.
- Luscious Filling Creation:
- Place one packet of gelatin in a small bowl with 120 milliliters of cold water and allow it to bloom for five minutes until fully softened. Meanwhile, in a large mixing bowl, whip 450 grams of heavy cream with one packet of vanilla sugar until stiff peaks form, being careful not to overwhip which would create a grainy texture. Using the large holes of a box grater, grate both the dark chocolate and coconut chocolate into a separate bowl, creating delicate shavings that will distribute evenly throughout the filling. Gently warm the bloomed gelatin mixture in a small saucepan over low heat or in short bursts in the microwave just until dissolved but not hot. Quickly whisk the gelatin mixture into 500 milliliters of cream yogurt until completely smooth. Working quickly before the gelatin begins to set, fold the yogurt mixture into the whipped cream using a rubber spatula with gentle, sweeping motions to maintain as much air as possible. Finally, fold in the chocolate shavings until evenly distributed throughout the cream.
- Assembly Architecture:
- Return the cooled chocolate cake to the clean springform pan. If desired, you may slice the cake horizontally to create two thin layers, spreading a portion of the filling between them for an extra creamy version. Otherwise, simply pour all of the cream filling over the single cake layer, using a spatula to create a smooth, even surface that reaches the edges of the pan. Gently tap the pan on the counter a few times to release any air bubbles that might be trapped in the filling. Cover the pan with plastic wrap, being careful not to touch the surface of the filling, and refrigerate for at least four hours or ideally overnight. The extended chilling time allows the gelatin to fully set, ensuring clean slices when serving.
- Finishing Flourish:
- For the crowning glory of this heavenly dessert, create a glossy chocolate glaze. In a heatproof bowl set over a pan of barely simmering water, combine 200 grams of dark chocolate broken into small pieces with 40 grams of coconut oil. Stir occasionally until completely melted and smooth, then remove from heat and allow to cool slightly for about five minutes. The glaze should be fluid enough to pour but not so hot that it would melt the cream layer. Remove the set cake from the refrigerator and carefully pour the glaze over the top, starting from the center and working outward in a spiral motion. Gently tilt the pan to help the glaze flow to the edges, creating a perfectly smooth surface. Return the cake to the refrigerator for at least 30 minutes to allow the glaze to set completely before serving.
I discovered that the grated chocolate technique came from an old Austrian bakery tradition where they would use whatever chocolate scraps remained from other desserts. My grandmother always insisted on using both dark and coconut chocolate, creating a more complex flavor profile. When I first served this cake at a family gathering, my uncle who claimed to dislike creamy desserts ate two slices before admitting it was the perfect balance of textures he'd ever experienced.
Elegant Serving Suggestions
This showstopping dessert deserves presentation that highlights its beauty and complexity. For everyday enjoyment, serve slices on white plates with a light dusting of cocoa powder for elegant contrast. When entertaining, consider embellishing each serving with fresh raspberries or a single perfect strawberry for color contrast and complementary flavor. Coffee enthusiasts will appreciate pairing slices with a small espresso to balance the sweetness and enhance the chocolate notes. For special occasions, create a dessert table featuring this cake as the centerpiece, surrounded by small dishes of whipped cream, chocolate curls, and seasonal berries for guests to customize their servings. The cake slices most beautifully when you warm your knife under hot water and wipe it clean between cuts.
 Pinnen
Creative Variations
While perfect in its classic form, this versatile cake welcomes thoughtful modifications for different occasions. Create a festive holiday version by adding a teaspoon of orange zest to the cake batter and substituting orange-flavored chocolate in the filling. For coffee lovers, dissolve a tablespoon of instant espresso powder in the oil before adding to the batter and incorporate coffee-flavored chocolate in the filling. Summer celebrations call for a berry infusion, with a layer of fresh raspberries arranged between the cake and cream filling. Those seeking a flavor adventure might enjoy a hint of spice by adding a quarter teaspoon of cinnamon and a pinch of cayenne to the cake batter for subtle warmth that enhances the chocolate experience. For textural contrast, consider sprinkling toasted chopped hazelnuts between the cake layer and filling.
Preservation Perfection
This magnificent cake maintains its quality remarkably well when properly stored. Keep the assembled cake in the refrigerator, covered loosely with plastic wrap or in a cake dome to prevent it from absorbing other food odors. The cake remains at peak quality for up to four days, with many connoisseurs claiming the second and third day offer the best flavor experience as the components meld together. For longer storage, individual slices can be carefully wrapped in plastic and frozen for up to one month. Thaw frozen slices overnight in the refrigerator for the best texture restoration. Avoid leaving the cake at room temperature for more than thirty minutes, especially in warm environments, as the delicate filling will begin to soften and lose its perfect texture.
My final thought on this Himmel im Mund Kuchen centers on its ability to create special moments. This isn't merely a dessert, but rather an experience that brings people together in shared appreciation. I've watched conversations pause and eyes close as people savor their first bite, followed by expressions of delight and wonder at how something can taste so complex yet harmonious. While it requires some effort and patience, the result rewards you with a dessert that truly lives up to its heavenly name. I've found that mastering this cake has given me confidence to tackle other seemingly complex desserts, proving that sometimes the most impressive creations come from following simple steps with care and attention to detail.
Häufig gestellte Fragen
- → Kann ich den Kuchen einen Tag vorher zubereiten?
- Ja, das ist sogar ideal! Der Geschmack intensiviert sich über Nacht und die Creme kann richtig fest werden. Bewahre ihn im Kühlschrank auf.
- → Womit kann ich die Gelatine ersetzen?
- Du kannst Agar-Agar als vegetarische Alternative verwenden. Beachte, dass die Verarbeitung etwas anders ist - folge der Packungsanleitung für die richtige Menge.
- → Kann ich auch eine andere Schokoladensorte verwenden?
- Natürlich! Du kannst die Schokoladensorten nach Belieben variieren. Auch weiße Schokolade oder Vollmilchschokolade funktionieren gut.
- → Wie kann ich den Kuchen dekorieren?
- Schokoraspeln, frische Beeren, Schokoblättchen oder essbare Blüten eignen sich hervorragend. Auch ein Hauch Goldpulver auf der Glasur sieht festlich aus.
- → Warum wird meine Sahne nicht steif?
- Verwende gut gekühlte Sahne und kühle auch die Schüssel vorher im Kühlschrank. Achte auf einen hohen Fettgehalt der Sahne (mind. 30%).